Repairing damaged CDs
From SqueezeboxWiki
Contents |
Repairing Damaged Discs
So your CD won't rip without errors? In order of severity, this is caused by:
- smudges, fingerprints or dirt
- read-side ("shiny side") radial scratches
- read-side abrasions
- read-side axial scratches
- "CD rot"
- label-side scratches
- pressing errors
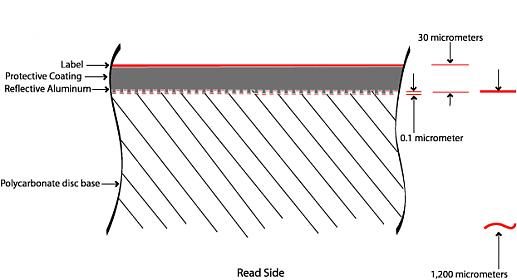
The following diagram illustrates the physical structure of a CD:
(image released to public domain by Skunk)
Important points:
- The optical pickup relies on the /extremely/ thin aluminum layer for reflectance. For conventional pressed CDs, the data isn't encoded into the layer itself, the data is pressed into the top of the polycabonate layer using a master and is made reflective with the thin coating of aluminum. Without this reflective layer, the data cannot be read.
- The read-side layer is a lot thicker than the label-side layer.
- Polycarbonate is /very/ tough material - safety glasses are made of this stuff. It's one of the toughest plastics around.
- There is very little protection for the critical aluminum layer on the label side: just a thin coating of acrylic sealer and the label varnish.
- The data on a CD is written in a microscopic spiral track from the centre to the edge, following the curvature of the disc. It is read back so that, if it could be unravelled, the data track passes by the optical pickup at a constant speed. In order to accomplish this, the motor will slow down as the track progresses from the centre to the outer edge since the disc circumference increases. This is referred to as constant linear velocity, CLV, as opposed to a vinyl record which plays back at constant angular velocity, CAV. On a CD this means that the songs at the beginning of the disc occupy a thicker portion of the disc than the tracks near the end of the disc.
Most CD damage can be completely repaired with a CD repair kit. You should use the Software h2cd (Windows only) after cleaning and before "repairing" your CD. If possible use a normal sized CD Drive not the slim formfactor ones used in Notebooks, cause the only uses 5V not 12V for the Laser/diode.
Software Repair (Windows only)
h2cd is a Software that can handle bad Disks - you can use the Software on different Computers with different CD Drives to get a better result.
CD Repair Kits
The purpose of a CD repair kit is to resurface the read side of the disc, eliminating scratches and abrasions in order to create a sufficiently clear area to allow the laser to penetrate through to the reflective layer. The principle is similar to ice resurfacing.
Since the polycarbonate layer is so thick, you can resurface it many times without damaging the reflective data layer.
CD repair kits can consist of manual kits or small machines. Both include the necessary secret: buffing compound. This is a liquid that contains abrasive particles. You apply the liquid and buff it in order to abrade away the defect in the polycarbonate. The abrasive is generally so fine that the polycarbonate surface will regain its shine.
Unfortunately the buffing compound can only do so much, and in my experience, if the defect is severe enough to cause read errors, it cannot be corrected by using the buffing compound alone. Fortunately many repair kits also come with very fine wet/dry sandpaper - the one I use is 2500 grit. Be sure to use the sandpaper wet. Sand the damaged area until you can no longer see the defect and follow-up with the buffing compound to reduce the opacity back to that of the original disc - you'll barely be able to tell the disc surface was sanded after the application of the buffing compound.
You could put together your own kit. A commercial buffing compound which works well for CDs is Brasso®, a metal polishing product, see here. Toothpaste also contains abrasive particles, but it may be harder to find one with enough grit. Smoker's toothpastes such as Topol and Pearl Drops have aggressive abrasives while toothpastes for sensitive teeth like Sensodyne have overly-mild abrasives. Even smooth peanut butter has abrasive particles, but like toothpaste, finding just the right grit may be difficult.
In order for the buffing compound to work properly, you need to press /very/ hard. This requires a tough cloth - paper towel is far too weak. The commercial kit I use comes with what I believe is hydroentangled paper, which is paper reinforced with plastic fibres. "J-Cloth" might work, as might "Shop Towels".
When applying this much force, you must protect the label side from abrasion. The buffing cloth should be large enough to do this conveniently - you lay out the entire cloth on a table, place the disc near one edge, fold the towel over and use the folded side to buff the disc.
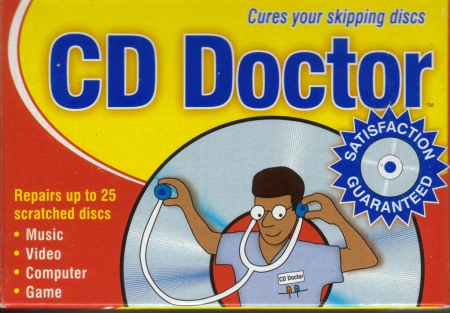
You can get a CD repair kit at many electronics stores like Radio Shack. It does not have to be expensive. The one I use will repair 25 discs or more and is priced at $6.99 Canadian - it's available at "The Source" in Canada. As it's repackaged in Canada, it will not be available outside of the country, but you will find local equivalents. Here's what the package looks like:
Yup, pretty hokey, but it's cheap and works perfectly. The machines are more expensive. The principle is the same, although I doubt the machines can buff with sufficient force to eliminate deep scratches.
Ripping utilities like EAC will mark read errors. Knowing which tracks have errors and the number of tracks on the disc, you can estimate where to look for damage.
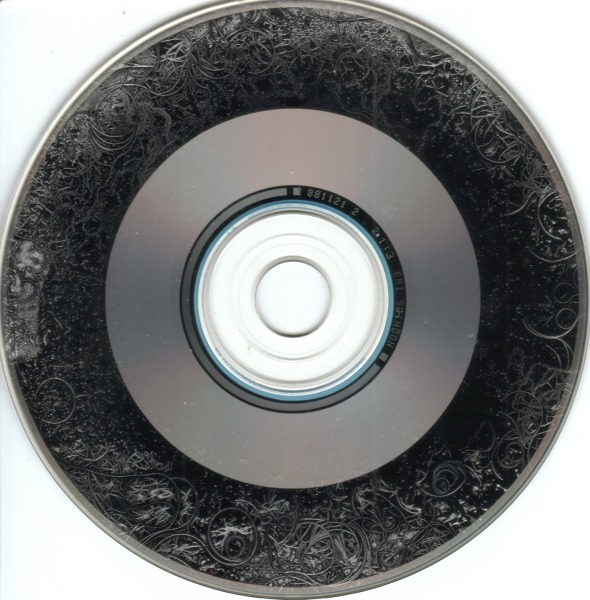
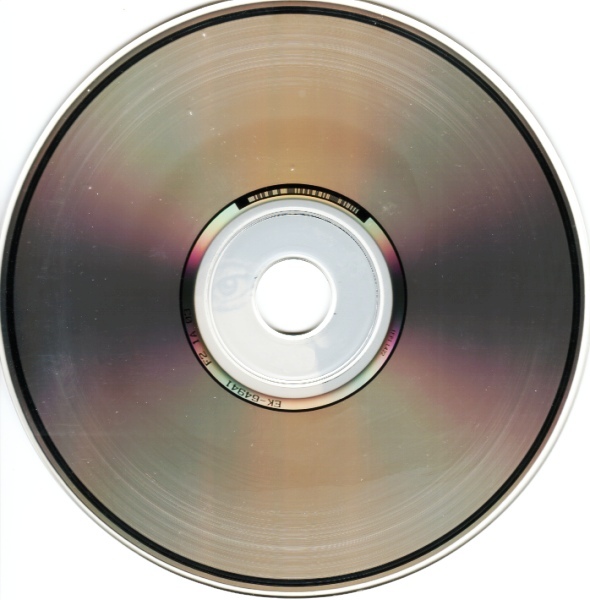
Conventional CDs hold 74 minutes of audio, so a typical album will not occupy the entire disc. On some older discs, you can actually see where the data layer ends - this is very evident on the CD image in section 1, below. This helps greatly in judging where to repair damage.
Alternatives to CD Repair Kits
Anything that can fill in disc scratches and exclude air in order to restore the disc transparency would work as well as a CD repair kit.
There are some commercial "CD enhancers" that may do this, though beware of false claims of improving sonic performance beyond that of an undamaged disc. [./Pledge%C2 Pledge�]� furniture polish may accomplish this. There is a very unorthodox but free method posted here: http://forums.slimdevices.com/showpost.php?p=187996&postcount=3
Key to this approach is completely eliminating the new reflective surfaces and opacity reductions caused by scratches and abrasions. This may be difficult to achieve in practice.
[/Anyone using these techniques or products, please provide more info!/]
1. Smudges, Fingerprints or Dirt
Specs of dirt and dust should not impair reading - the laser is focused on the reflective layer. The polycarbonate layer is so thick in comparison to the laser focusing abilities that dirt and dust on the polycarbonate surface is very out-of-focus.
However if there are extensive smudges, fingerprints, or deposits of very opaque material, reading can be affected.
Simply clean the disc! Note that this is also required after disc repair using a repair kit.
Wiping the disc with a dry, clean cloth may be adequate. Do not use your shirt - even if it looks clean, it can still carry tiny abrasive particles which can scratch the disc. For best results, especially with greasy fingerprints, use a solvent. You want to use a solvent that does not leave streaks yet has some degreasing capabilities - this may rule out water. Try glass cleaning fluid or rubbing alcohol (isopropyl alcohol). Note that isopropyl alcohol comes in 3 concentrations: 70%, 91% and 99%. The remainder is water. Higher concentrations will leave less water streaking - 99% is highly recommended. Isopropyl alcohol is available at any pharmacy but the high-purity variety may be behind the counter.
You may also use methyl alcohol or ethyl ("denatured") alcohol. Do NOT use acetone/nail polish remover, lacquer thinner, paint thinner, benzene, toluene or other powerful solvents as these may attack the polycarbonate, permanently fogging the surface. Also any drips on the label side will dissolve the label and acrylic sealer, exposing the aluminum layer to oxidation and damage.
Coat the read-side surface in the solvent and wipe with a clean, lint-free cloth from the centre of the disc to the edge. This way, if any scratches are created, they will be the mild radial type, see below. Never clean in a circular motion parallel to the edge of the disc - this could lead to the much more severe axial scratches.
Use a second cloth to wipe the disc dry.
To avoid this in the first place, always handle a disc by the edges. You may also handle a disc by placing your finger in the centre hole.
As an unusual aside, a couple of my discs have developed a fungal growth - or so I was told by a reliable authority. They are both CD singles in "slimline" CD packs with a cardboard flip-over cover. I hypothesize that the porous cardboard houses the fungal spores. The pattern is quite unusual, as you see:
The fungus could not be simply wiped off, it felt hard and slighly sticky. Fortunately isopropyl alcohol cleaned it off very easily.
2. Read-Side Radial Scratches
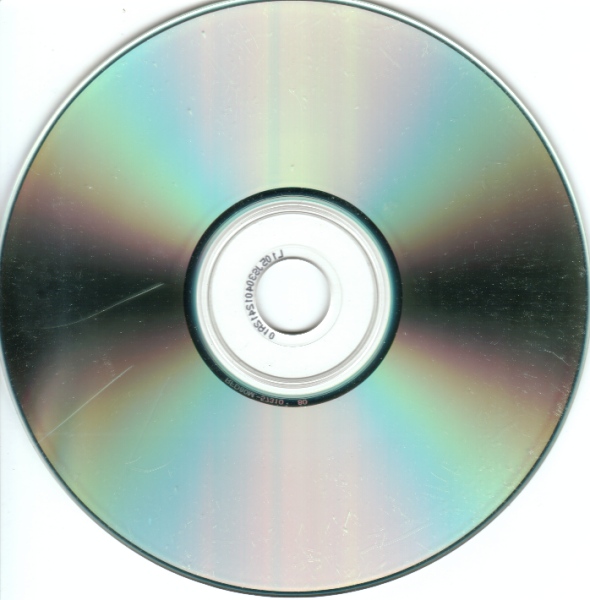
These are scratches extending from the centre to the edge, perpendicular to the axis of rotation.
Radial scratches may not cause errors at all. A radial scratch crosses the data track at right angles, interrupting a comparatively limited number bits per rotation. Sometimes this may not be enough to cause a read error, and even if there are read errors, the defects may be inaudible since it affects so few bits per rotation. At worst, the error may be audible as a slight tick in one channel or a more noticeable pop in both channels.
Note that all read-side damage types do not destroy the data. They affect the polycarbonate layer but not the critical aluminum reflective layer. The data is still intact but the scratch creates an opaque or reflective defect which prevents the laser from reading through to the data layer. Higher-quality optical pickups may be able to better cope with these defects. If the defect is removed with a CD repair kit, the optical pickup can read the data perfectly again.
3. Read-Side Abrasions
This is a scrape causing a fogged area, neither a radial scratch nor an axial scratch.
It can result in an audible defect because it's wide enough to qualify as an axial scratch, see below. It too can be completely repaired.
4. Read-Side Axial Scratches
These are scratches that run parallel to the disc edge in a cicular pattern. They are caused by the disc being improperly secured in a cheap drive and scratching against the disc tray while rotating. Laptop drives may also cause these scratches since they do not hold onto a disc as securely as a full-size drive and the laptop is more likely to be moved while the disc is spinning.
Axial scratches are much more serious than radial scratches because they follow the data path, causing a long, usually unrecoverable sequential string of errors that are usually audible as a repeating scratching sound or outright dropout. But a CD repair kit can completely repair this damage if you work hard enough at it.
5. "CD Rot"
(from http://www.rdrop.com/~half/General/CDRot/CDRot.html)
(from http://foetusized.org/cdrot.html)
See here. It took a while to perfect the acrylic sealer used on the label side of CDs to protect the reflective layer, and as a result, some early CDs are susceptible to this. On CDs, the cause is oxygen penetrating the acrylic layer, leading to oxidation. The end result is damage or discolouration of the reflective layer.
Damage to the reflective layer cannot be repaired, see below. Discolouration of the reflective layer will affect reflectance. Newer and better optical pickups can still operate properly with less reflectance, especially pickups designed for rewriteable media as it is less reflective. However, this damage is progressive and irreversible, and there will come a point where it's no longer reflective enough for any drive to be able to read it without errors.
A disc affected by CD rot cannot be repaired, it must be replaced. Fortunately this damage is rare and the manufacturer most affected by this has stated that it will replace any such CDs.
6. Label-Side Scratches
Hold the CD up to a light. If you can see light through scratches or pinholes in the label, you have label-side scratches.
This damage cannot be repaired. The reflective layer has been removed. No optical pickup, no matter how good it is, can ever read data without a reflective layer present.
Simply restoring the reflective surface, say with silver paint, won't help either. The critical structures which form the data layer are only 125 nanometres deep, so small they can only be seen with a microscope. If the damage is enough to have scratched off the label varnish, acrylic sealer and aluminum layer, it almost surely has scratched off this tiny layer, so making this layer reflective again won't help - the data is gone.
Protect your CDs from label damage! Perhaps one of the easiest ways to avoid label damage - never write on the label side in ballpoint pen.
7. Pressing Errors
As explained above, the data layer is microscopic. If the disc moves even slightly while the master is being pressed into it, the data layer could be compromised.
No repair is possible. These discs are defective right from the factory. The defect may or may not be visible to the naked eye - I have one such disc which has an odd wave-like pattern in the reflective layer near the affected track. Not all tracks can be affected, and not all players may have trouble with the disc.
Fortunately this damage is rare. Disc masters are carefully checked and finished discs are spot-checked. A defective master would either be spotted before production or if every spot-check fails. A defective disc would therefore have to be produced by a perfect master but escape the spot-check. This means they are quite rare.
Provided you retain proof-of-purchase, almost all retail stores will replace such defective discs.
/Original contributor: Mark Lanctot/
/[./Brasso%C2 Brasso�]� is a registered trademark of Reckitt Benckiser plc./
/[./Pledge%C2 Pledge�]� is a registered trademark of S. C. Johnson & Son, Inc./
