Make Boom look like the Box
From SqueezeboxWiki
Please note: these instructions are outdated as of Squeezebox Server 7.4 and the latest MusicInfoSCR versions. Install from Squeezebox Server's Plugin's page instead of fiddling with the zip file. The format configuration as described here is now MusicInfoSCR's default.
Don't hesitate to read on if you like the lecture. But don't get confused by these now outdated instructions ;-)
Contents |
Intro
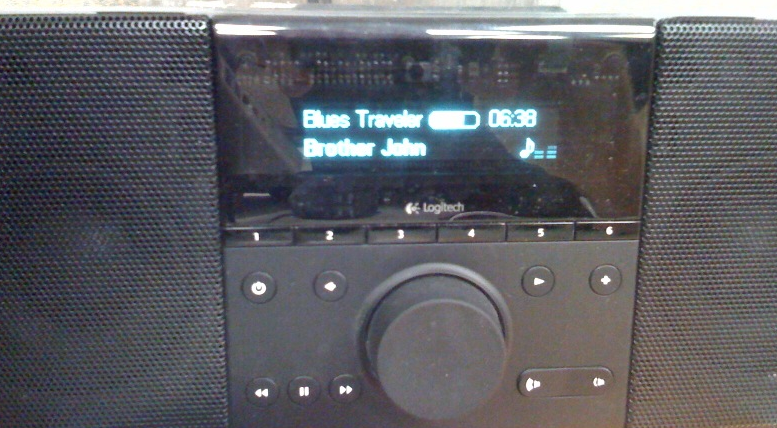
Many people have noticed that the SqueezeBox Boom on the shipping "boxes" has a "Now Playing" screen that looks different than what is offered in SqueezeCenter by default. This was done using the MusicInfo SCR plugin.
Installing the Plugin
I'm not going to explain how to install a plugin for every platform in this article. Instead, read the instructions for the MusicInfo SCR plugin for more details on installation. However, for the purposes of making this guide complete, I will include the instructions on how to do this on a Mac.
Our Goal
Our goal here is to make the Boom display look like the one on the Box (and the SlimDevices web page). See here:
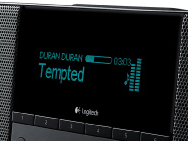
Steps...
Download
Download the MusicInfo SCR plugin. You need version 4.2.0 or newer.
http://www.herger.net/MusicInfoSCR
Open Terminal
(this step is Mac-specific -- you'll need to do this for any platform your on, but it will be different for each platform) Open up a Terminal window. (Terminal is located in your Applications folder on your Mac)
Find Plugin Directory
Change into the Plugins directory. This is assuming you've installed SqueezeCenter the default way which is for your individual user, not for the whole system.
House-Server:server diranged$ cd ~/Library/Application\ Support/SqueezeCenter/Plugins/
Unzip Archive
Unzip the MusicInfo Zip file you have downloaded (from step 1). This step assumes you've downloaded the file into the "Downloads" directory on Mac OSX Leopard. Adjust as necessary.
House-Server:Plugins diranged$ unzip  ~/Downloads/MusicInfoSCR-4.2.0.zip
Archive:  /Users/diranged/Downloads/MusicInfoSCR-4.2.0.zip
  inflating: MusicInfoSCR/lib/Plugins-MusicInfoSCR-Plugin.par
  inflating: MusicInfoSCR/install.xml
  inflating: MusicInfoSCR/HTML/EN/plugins/MusicInfoSCR/settings/basic.html
  inflating: MusicInfoSCR/HTML/EN/plugins/MusicInfoSCR/settings/preview.html
  inflating: MusicInfoSCR/HTML/EN/plugins/MusicInfoSCR/html/preview.css
  inflating: MusicInfoSCR/HTML/EN/plugins/MusicInfoSCR/html/restofthemall.css
  inflating: MusicInfoSCR/HTML/EN/plugins/MusicInfoSCR/html/win.css
  inflating: MusicInfoSCR/MIScrIconsSB2.1.font.bmp
  inflating: MusicInfoSCR/MIScrIconsSBG.1.font.bmp
  inflating: MusicInfoSCR/MIScrVolumeSB2.2.font.bmp
  inflating: MusicInfoSCR/strings.txt
House-Server:Plugins diranged$
Restart SC
Restart Squeezecenter by going into the System Preferences, clicking on SqueezeCenter, and then selecting "Stop Squeezecenter", and then "Start Squeezecenter".
Add Artist Format
- Go to the SqueezeCenter Web UI at http://127.0.0.1:9000.
- Click on Settings on the bottom right of the web page.
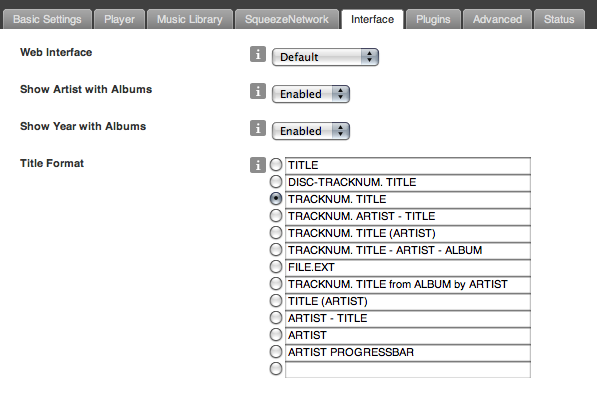
- Click on the Interface tab.
- Add a Title Format with the text "ARTIST PROGRESSBAR" and nothing else. Do not check the box next to this, just add it to the bottom box that should be open.
- Click Apply
Set Player to use MusicInfo
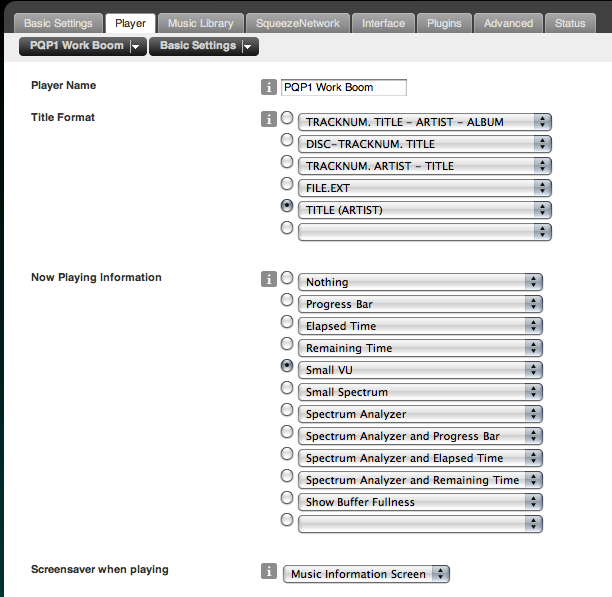
- Click on the Players tab
- Select Basic Settings from the drop-down tab at the top.
- Set the Now Playing information to Small VU
- Set the Screensaver When Playing to Music Information Screen
- Click Apply
Define Screen
- Select Music Information Screen from the drop-down tab at the top.
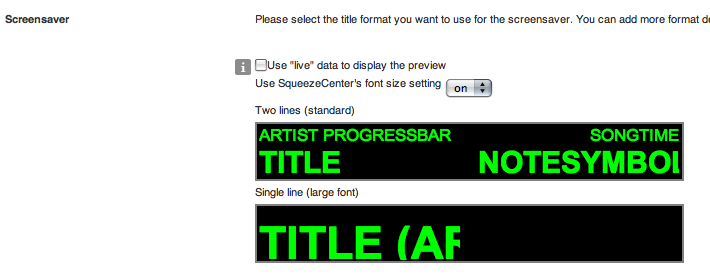
- Scroll down to the 'Screensaver' section and make the following changes to the FIRST screen that is shown.
- Select Playing (X_OF_Y) with the mouse. A dropdown box will appear, change that box to ARTIST PROGRESSBAR.
- Select PLAYTIME_PROGRESS with the mouse. A dropdown box will appear, change that box to SONGTIME
- Select TITLE (ARTIST) with the mouse. A dropdown box will appear, change that box to TITLE
- Select the empty space BELOW SONGTIME with the mouse. A dropdown box will appear, change that box to NOTESSYMBOL.
- When you're done, it should look like this:
- Click Apply
Done!
You're all done! Play some music!
