SqueezeJS tutorial
From SqueezeboxWiki
Let's start off with the basic HTML code we'll need to create that page:
<html>
<head>
	<title>SqueezeJS demo page</title>
</head>

<body>
	<div id="cover"></div>
</body>
</html>
Save this as eg. EN/html/SqueezeJS/demo.html in your SqueezeCenter installation folder. You'll then be able to load it using http://yourserver:9000/html/SqueezeJS/demo.html
Contents |
Loading the SqueezeJS library
This simple file will create a page with an empty div where we'd like to see our cover art. Now let's add our libraries. There are quite a few files required, and the order is pretty important too:
<head>
	<link rel="stylesheet" type="text/css" href="/html/ext/resources/css/ext-all.css?r=[% revision %]" />

	<script type="text/javascript" src="/html/ext/adapter/ext/ext-base.js?r=[% revision %]"></script>
	<script type="text/javascript" src="/html/ext/ext-all.js?r=[% revision %]"></script>
	<script type="text/javascript">[% PROCESS html/vars.js %]</script>
	<script type="text/javascript" src="/html/SqueezeJS/Base.js?r=[% revision %]"></script>
	<script type="text/javascript">[% PROCESS html/SqueezeJS/Strings.js %]</script>
	<script type="text/javascript" src="/html/SqueezeJS/UI.js?r=[% revision %]"></script>

	<title>SqueezeJS demo page</title>
</head>
The first new line is loading the default ExtJS style sheet. It contains all definitions for the UI components such as buttons, layouts and many more. As soon as you plan to use any such component, you'll need to load ext-all.css.
Second come a bunch of JavaScript files. The order is important:
- ext-base.js - this is the ExtJS base class which handles low-level stuff like AJAX communication with the server
- ext-all.js - this library loads all the ExtJS goodness, high-level code for UI components, drag'n'drop support and a whole lot more.
- vars.js - this file has to be processed using the Template Toolkit. It will load some SqueezeCenter variables into JavaScript globals, such as the currently selected player ID
- SqueezeJS/Base.js - the SqueezeJS base class, which handles communication with the server, the SqueezeJS.Controller monitoring player state etc.
- SqueezeJS/Strings.js - this file should be processed whenever you plan to use the UI library too. It will localize all the strings used in SqueezeJS/UI.js (button labels and tooltips and more)
- SqueezeJS/UI.js - last but not least this is the component library we're going to use a lot. It offers many different buttons (play, power, fwd, rwd etc.), labels (track information) and more.
Initializing the SqueezeJS framework
Now let's start adding some of the magic we'll need to get things started. Let's initialize the SqueezeJS.Controller class. Add the following lines to the page's header:
<script type="text/javascript">
	Ext.onReady(function(){
		SqueezeJS.Controller.init({
			player: playerid
		});
	});
</script>
Ext.onRead() will execute the enclosed block of code as soon as the framework is fully loaded and ready to run. In our case we have it load SqueezeJS.Controller. This is the main object which cares about communicating with [SqueezeCenter]. We only pass the currently select player ID (included throught the above vars.js). Nothing more is required to get started.
SqueezeJS.Controller will monitor player and server state, playlist changes etc. and accordingly fire events to the components used on our page. All SqueezeJS.UI components listen to some of these events to act appropriately.
Adding SqueezeJS.UI components
Let's start with what's most important: eye-candy. Let's add the album artwork to our page. It will listen to the "playerstatechange" event. In this case it will update itself to display the new track's artwork.
Adding a SqueezeJS.UI component is pretty straight-forward. Just add the following lines to the block executed by Ext.onReady():
Ext.onReady(function(){
	SqueezeJS.Controller.init({
		player: playerid
	});

	new SqueezeJS.UI.Coverart({
		el: 'cover'
	});
});
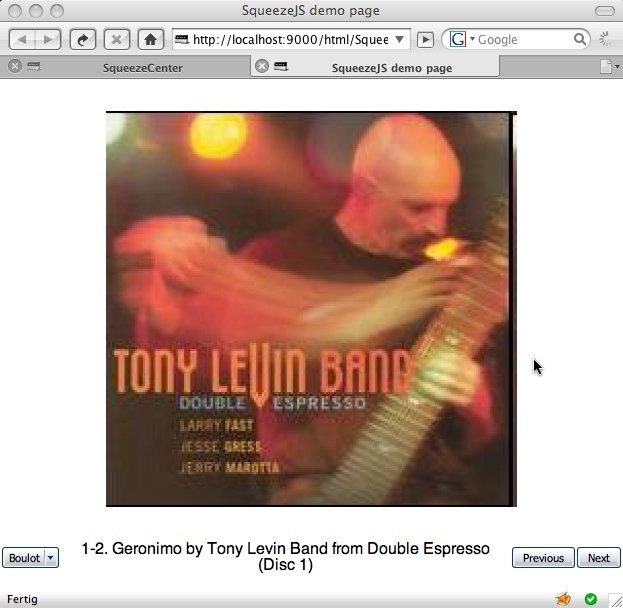
"el" defines the HTML element, where the coverart should be displayed. Now reload the page, and you should see the cover of the currently playing track displayed on your page. Hit Next on your remote control - and the page should be updated within a few seconds.
Now that was simple! Let's get some more information on that page. First we need some more HTML elements to hook our components into. We'll use a table to have them spread across the page in a row. Edit the HTML body to look like this:
<body>
	<div id="cover"></div>
	<table id="info">
		<tr>
			<td id="playerChooser"></td>
			<td id="title"></td>
			<td id="back"></td><td id="next"></td>
		</tr>
	</table>
</body>
Now let's add a few more components to the JS code:
<script type="text/javascript">
	Ext.onReady(function(){
		SqueezeJS.Controller.init({
			player: playerid
		});

		new SqueezeJS.UI.Coverart({
			el: 'cover'
		});

		new SqueezeJS.UI.Buttons.PlayerDropdown({
			renderTo: 'playerChooser'
		});

		new SqueezeJS.UI.CompoundTitle({
			el: 'title'
		});
		new SqueezeJS.UI.Buttons.Rew({
			renderTo: 'back'
		});
		new SqueezeJS.UI.Buttons.Fwd({
			renderTo: 'next'
		});
	});
</script>
The "renderTo" config parameter is used to define what HTML element the Buttons should be rendered to. Now reload the page and hit some of the buttons. The artwork and title display should update immediately.
Adding some more magic
Now you'd like to have this page in kiosk mode in your browser, displaying the artwork as large as possible? Let's add some code to resize it to 80% of the screen size:
var maxHeight = Math.min(Ext.lib.Dom.getViewWidth(), Ext.lib.Dom.getViewHeight()) - 100;
new SqueezeJS.UI.Coverart({
	el: 'cover',
	size: maxHeight
});
Ext.get('cover').setHeight(maxHeight);
By default SqueezeJS.UI.Coverart will display the artwork file whatever size it is stored on your disk. Using the size parameter you'll tell it to resize the file to the wanted size.
The full demo file
Store the following file, if you want to follow the tutorial the easy way ;-). The additional noLink parameters I've added to the component configuration will remove any link pointing to some SqueezeCenter page. If you don't add this parameter artwork, track details etc. will be linked to the usual pages, such as eg. browse artist etc.
<!DOCTYPE html PUBLIC "-//W3C//DTD HTML 4.01 Transitional//EN" "http://www.w3.org/TR/html4/loose.dtd">
<html>
	<head>
		<meta http-equiv="Content-Type" content="text/html; charset=UTF-8">
		<link rel="stylesheet" type="text/css" href="/html/ext/resources/css/ext-all.css?r=[% revision %]" />

		<script type="text/javascript" src="/html/ext/adapter/ext/ext-base.js?r=[% revision %]"></script>
		<script type="text/javascript" src="/html/ext/ext-all.js?r=[% revision %]"></script>
		<script type="text/javascript">[% PROCESS html/vars.js %]</script>
		<script type="text/javascript" src="/html/SqueezeJS/Base.js?r=[% revision %]"></script>
		<script type="text/javascript">[% PROCESS html/SqueezeJS/Strings.js %]</script>
		<script type="text/javascript" src="/html/SqueezeJS/UI.js?r=[% revision %]"></script>

		<script type="text/javascript">
			Ext.onReady(function(){
				SqueezeJS.Controller.init({
					player: playerid
				});

				var maxHeight = Math.min(Ext.lib.Dom.getViewWidth(), Ext.lib.Dom.getViewHeight()) - 100;
				new SqueezeJS.UI.Coverart({
					el: 'cover',
					noLink: true,
					size: maxHeight
				});
				Ext.get('cover').setHeight(maxHeight);

				new SqueezeJS.UI.Buttons.PlayerDropdown({
					renderTo: 'playerChooser'
				});

				new SqueezeJS.UI.CompoundTitle({
					el: 'title',
					noLink: true
				});

				new SqueezeJS.UI.Buttons.Rew({
					renderTo: 'back'
				});
				new SqueezeJS.UI.Buttons.Fwd({
					renderTo: 'next'
				});
			});
		</script>

		<style>
			#cover {
				margin-top: 25px;
				text-align: center;
			}
			#info {
				width: 100%;
				margin-top: 25px;
				text-align: center;
				font-family: sans-serif;
			}
		</style>

		<title>SqueezeJS demo page</title>
	</head>
<body>
	<div id="cover"></div>
	<table id="info">
		<tr>
			<td id="playerChooser"></td>
			<td id="title"></td>
			<td id="back"></td><td id="next"></td>
		</tr>
	</table>
</body>
</html>


